
Virginia and I thought we’d kick it up a notch in 2015 and attempt two routes through the highest and most remote regions in the lower 48; the Sierra Nevada of California and Wind River range in northwest Wyoming. Largely off-trail and remaining at high elevation, it was a big step up from our thru-hike of the AT last year, requiring skills and a mindset very different of that needed for a typical long walk on a trail. We combined the Sierra High Route (SHR) with the Southern Sierra High Route (SoSHR) for a longer trek of around 250 miles through the wonderful range (We made up our own finish after having to retreat from a lengthy and failed attempt at an impassable route over Acrodectes ridge). This route also allowed us to start and finish on the same side of the range, which simplified logistics. Within a week of finishing the Sierras, we were in Wyoming starting the Wind River High Route (107 miles) (WRHR). With relatively little information on these two routes, we thought we’d share our reflections and recommendations on what it took to complete them, back to back.

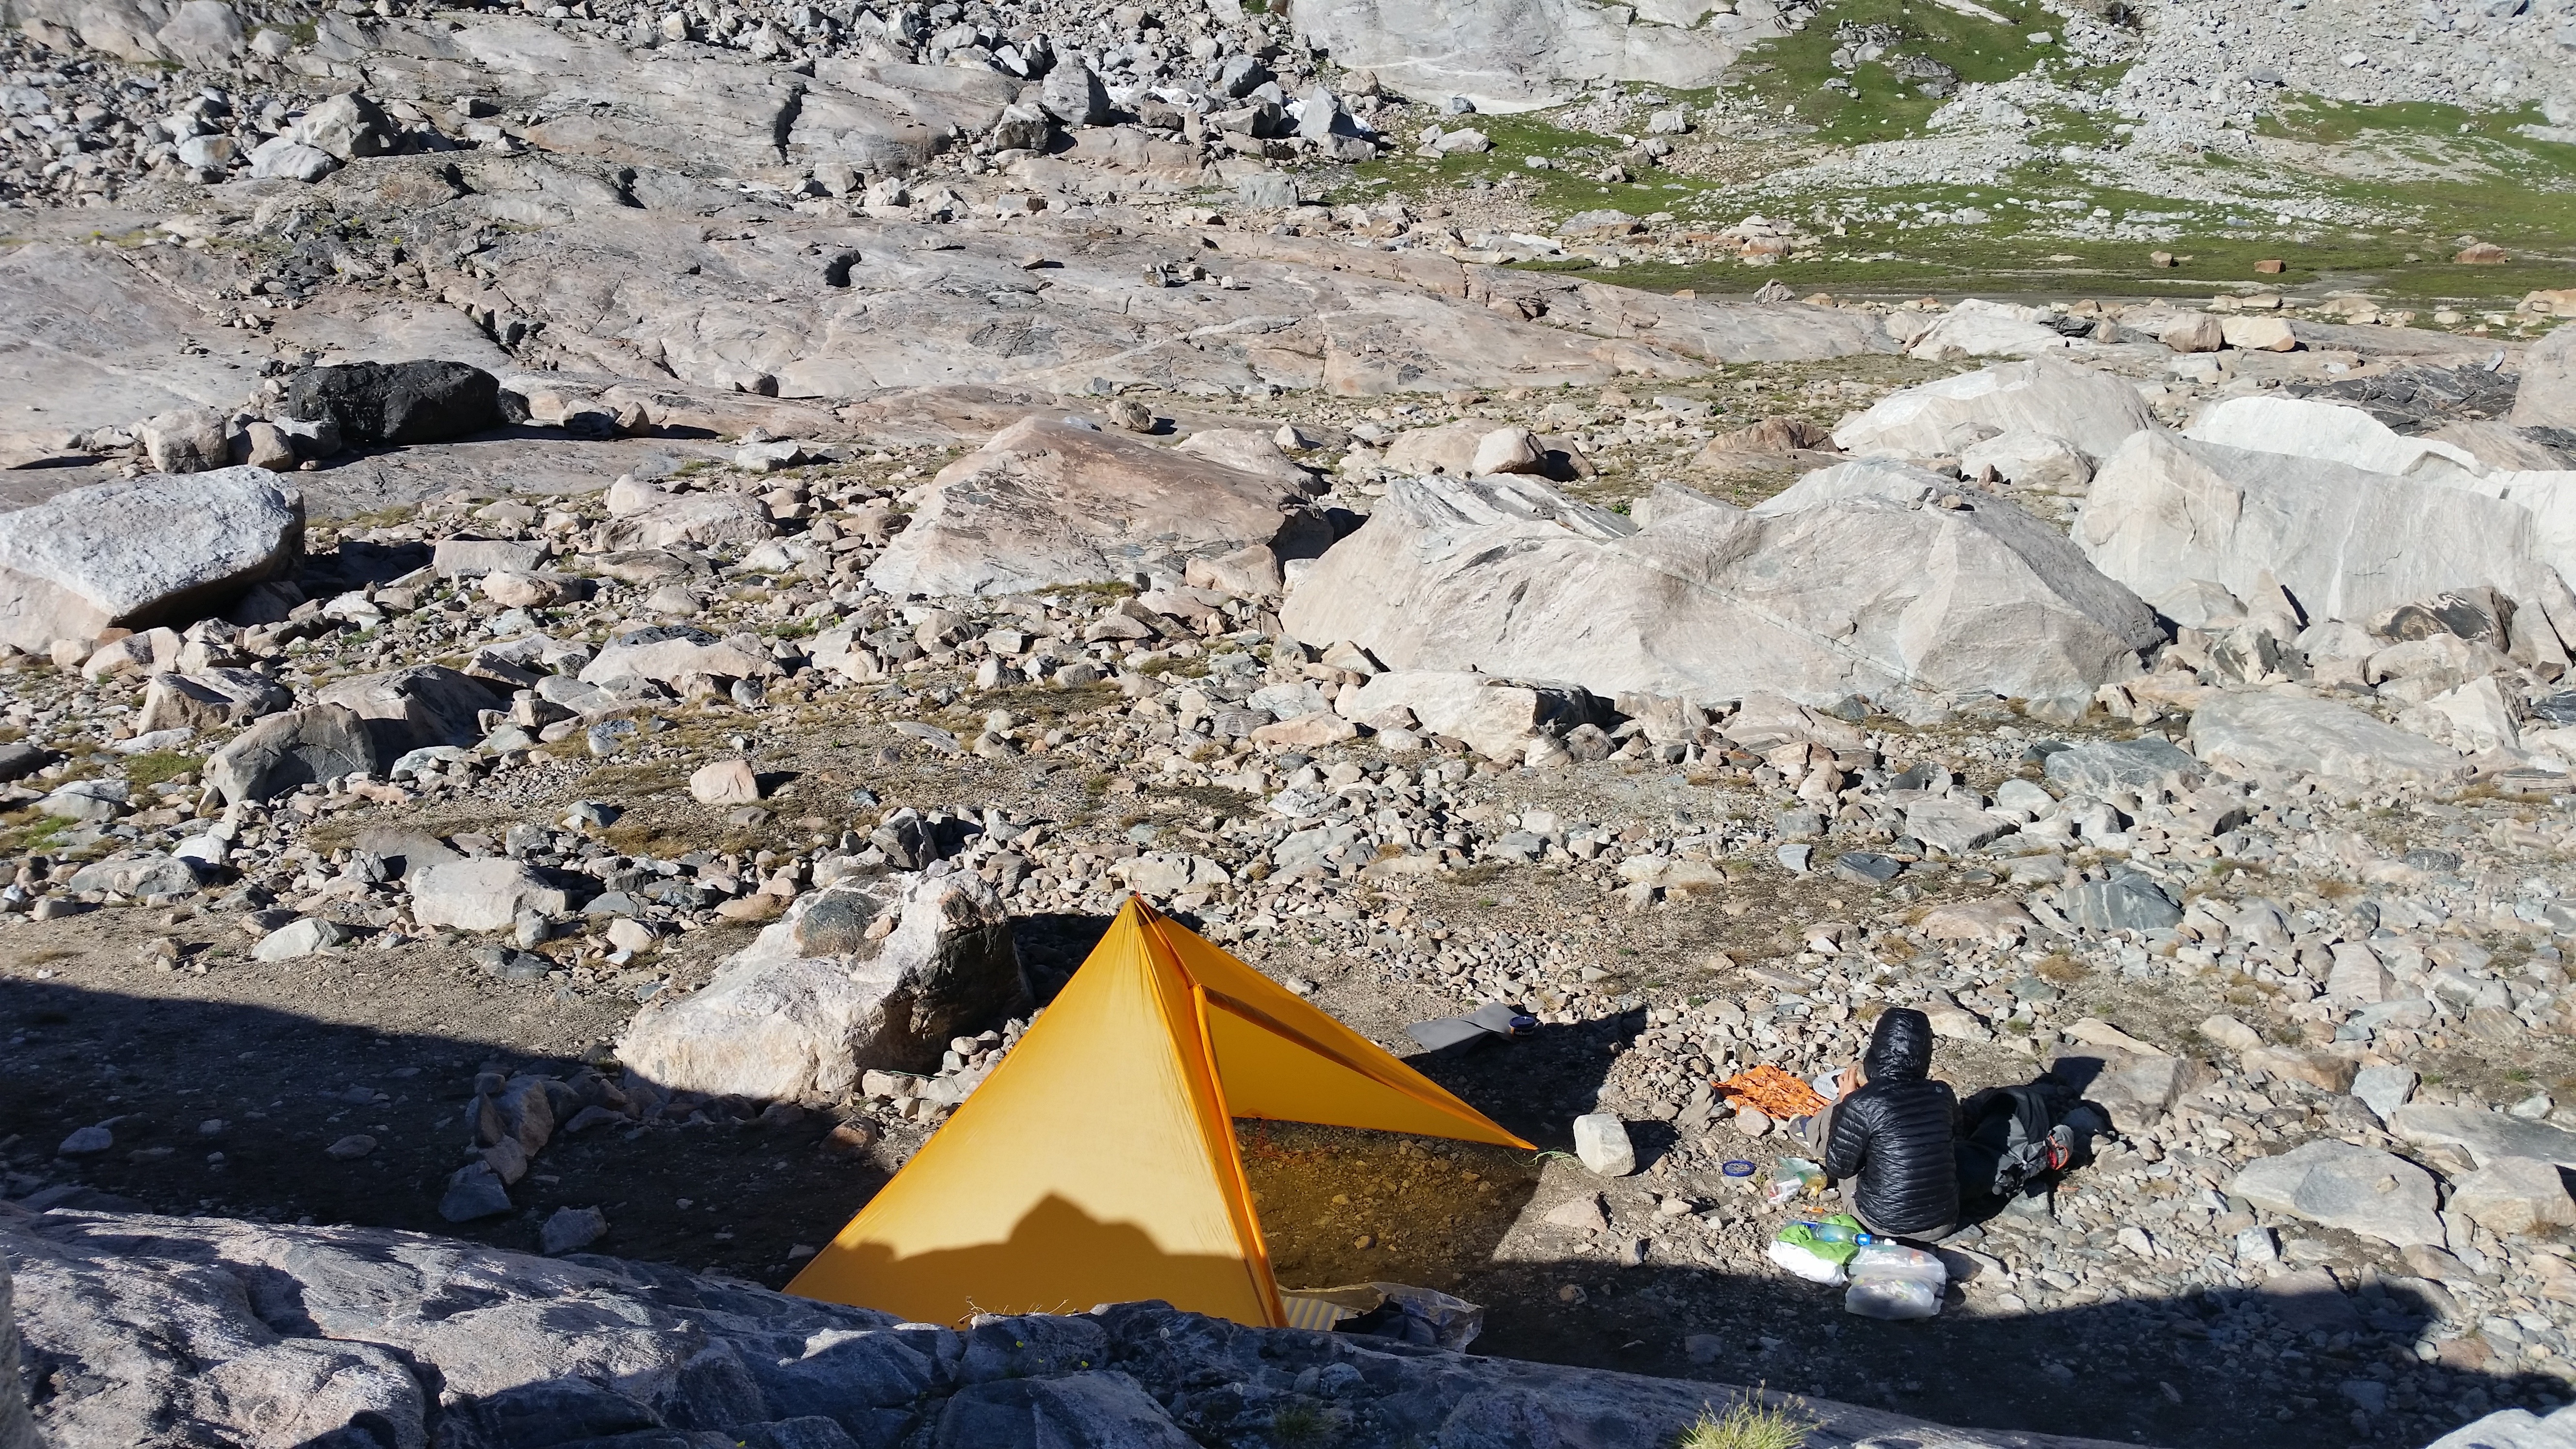
SHELTER Mountain Laurel Designs Trailstar
An old favorite. We’ve pitched the Trailstar in nearly every corner of the U.S. during bike trips and thru-hikes. During the winter we experimented with several other shelters, but came back to the TS for three main reasons.
1. Unparalleled protection above treeline.
2. Oodles of space for two and gear
3. Ease of setup and adaptablility

We’ve sat out some extreme weather under the Trailstar, and conditions on the two high routes were no different. In both ranges, we experienced high winds, sleet, snow, and rain, and the TS handled it all without a hiccup. Space for two is more than adequate, affording us both plenty of room to sit up straight, spread out our gear, change clothes, eat, and sleep. Several online reviews criticize the TS for it’s large footprint, which we’ve never found to be a problem in practice, and we’ve pitched it in some pretty tight and awkward locations. It pitches quickly and easily with one or two trekking poles and six stakes, after a bit of practice. Although many sources consider trekking poles to be a prerequisite for routes of this nature, we found the use of both hands more helpful on the miles and miles of talus, and actually prefer hiking without poles now. We carried one pole each, and only used them on a few water crossings.

Setting the TS up as a four-sided pyramid is a good configuration for snow, smaller spaces, or a quick emergency shelter. Stake four corners into a square and set one pole in the center. Here, we set up at the top of Shout-of-Relief Pass due to high winds, snow, and decreasing visability during a particularly tricky routefinding section.

Voila! With the center pole set, the extra panel of fabric is your “birth canal” for slipping into and out of the shelter. Grab the extra tieout, fold the panel left or right, and secure it to one of the corner stakes already in use. Pull the four corners tight and you’re set.

Pitched as a four-sided mid in a tight spot near the base of Indian Pass in Wyoming.
Tip: Roll the extra panel fabric up during good weather to create a room with a view.
Sleeping Bag/Quilt

Zpacks 10* and Katabatic 22*
Temperatures were mild-ish in the Sierra during the majority of our trip, while bluebird days in the Winds made for noticibly colder nights. Virginia was warm and comfortable every night in her Zpacks 10 degree bag. With a Katabatic Alsek, I could have gotten by with a less insulation, but appreciated the extra warmth several nights in Wyoming when the temps dropped below freezing.

If the threat of precipitation is minimal, we forego shelter and bivy under the stars. We both used Katabatic Bristlecone bivys in the Sierra and were thankful for the wind and insect protection they afforded. Condensation (a common gripe among bivy users) was minimal, dried quickly, and never compromised the down in our bags. I left my bivy behind in Wyoming, carrying a polycro groundsheet instead, and quickly regretted the decision during the first few evenings when the mosquito pressure was heavy. Virginia carried her bivy through the Winds and had no such regrets. Coupled with small NeoAir pads and our sole luxery item, a 2 ounce inflatable pillow by Montbell, we slept very comfortably every night on often rocky and uneven terrain. We kept our lower legs padded/insulated with our packs.
PACKS Gossamer Gear Kumo/MLD Prophet

We both started with base weights around seven pounds, minus food and water. On these routes Virginia carried the ‘Kumo’ by Gossamer Gear, and I was using the ‘Prophet’ by Mountain Laurel Designs. We had reservations before the start of the SHR about their capacity, unsure of our pace off-trail and how much food we could comfortably carry through such rugged terrain, not to mention the fact that we would both be carrying space-eating bear canisters. We found both packs to carry the canisters well, and repeatedly carried 7-days of food with only minor discomfort the first day or so. The lack of bear canisters in the Winds made for easier packing and better weight distribution.

VA uses her Kumo to elevate as she reads the next section of Roper’s high route.
CLOTHING
Clothing is one area that we deviated from our normal selections of shorts/t-shirt for something more substantial. We both wore long-sleeve nylon/polyester blend shirts and nylon pants along these routes to combat the constant sun exposure and help deal with mosquitoes. We don’t carry Deet (or any other bug juice) and found our clothing, coupled with a simple mosquito headnet, to be all the bug protection we needed, even for the heavy pressure we encountered in the Winds.
Our clothing selections were a success. We appreciated the abuse they could handle, found the stink factor minimal, and never felt too hot in them. We carried light running shorts in the Sierra for trail sections, and liked having them.

Virginia’s long sleeve button-up shirt and nylon blend pants protected her from sun, insects, brush, and abrasive granite while keeping her cool and comfortable.
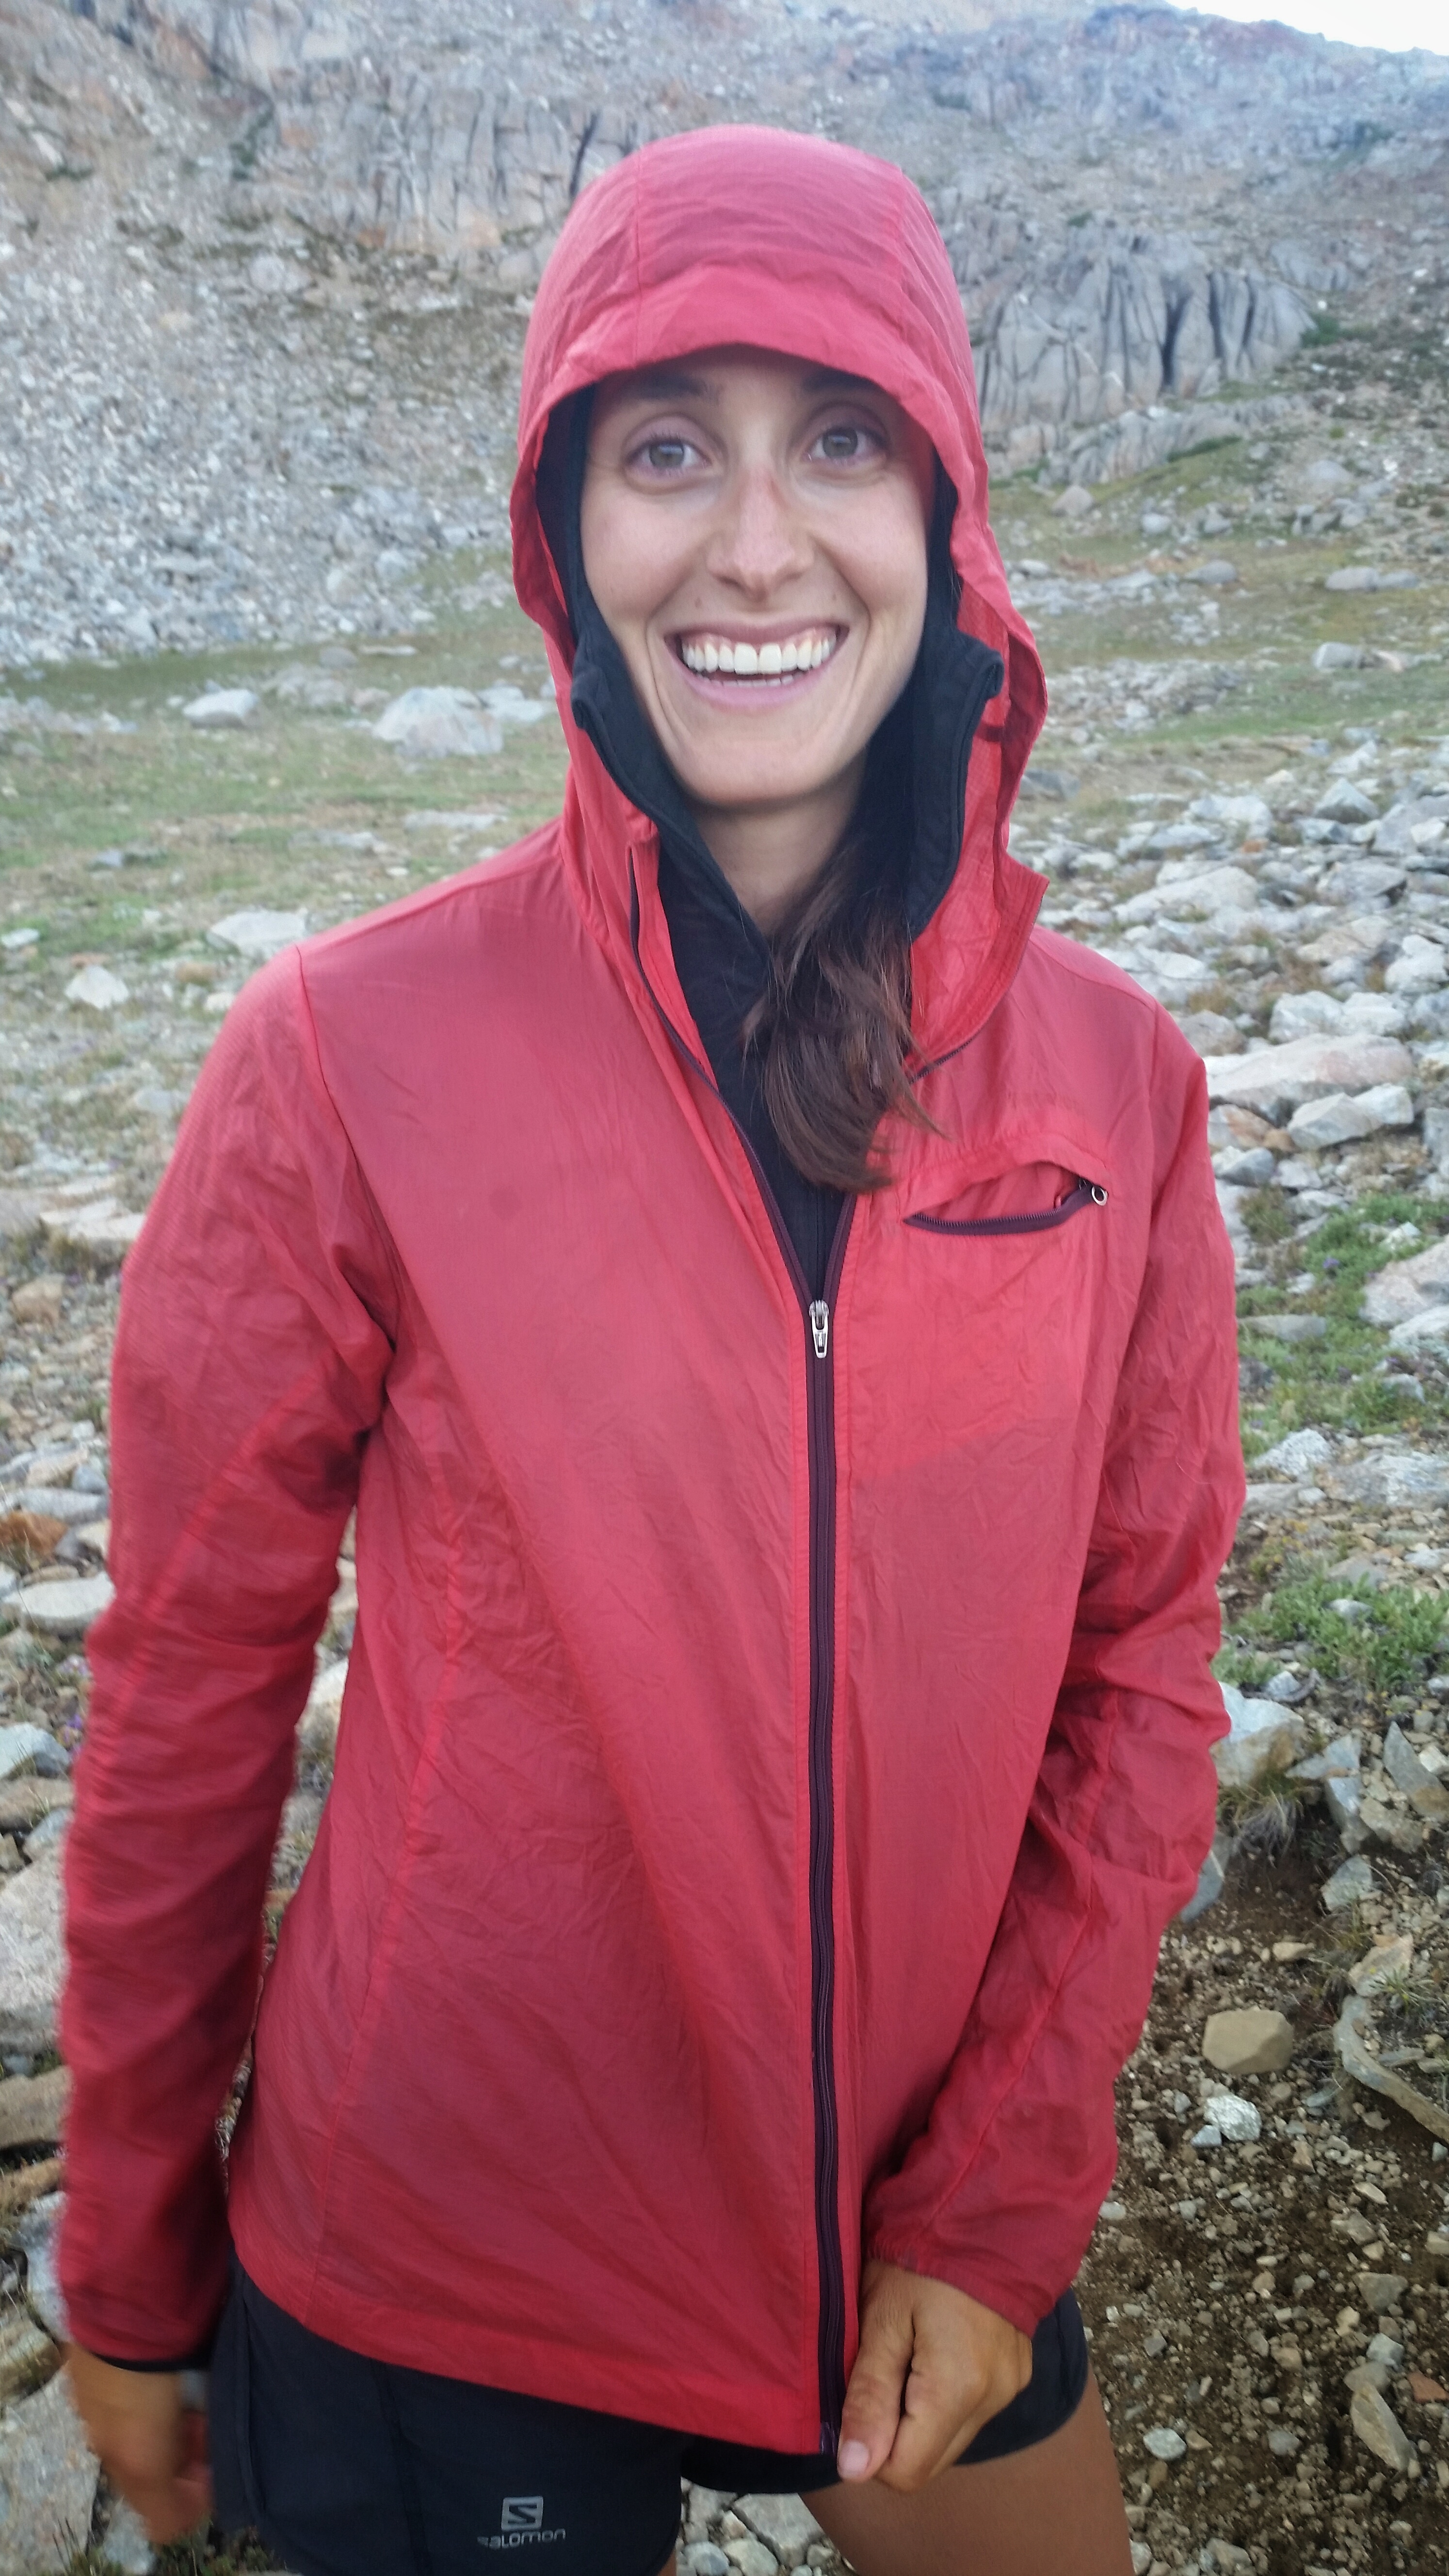
VA with the Cap 4 hoody/Houdini combo, a tough-to-beat cool weather active layer.
Virginia packed her down jacket as well as a Patagonia Cap 4 hoody, which she found adequate for all but the coldest and wettest days. In the Sierra I carried a Patagonia R1 pullover as my sole insulation and was warm. In the cooler Winds, a hooded down jacket jumped in the mix. We also carried a hooded wind jacket each (Patagonia Houdini/Montbell Tachyon Anorak), which have always been one of our most used articles of clothing. All outfits were treated with Permethrin in a K-Mart parking lot before we began. It should go without saying that a sun hat with a good brim is essential, as are a good pair of sunglasses. We use Native sunglasses for the amazing protection, as well as the kick-ass warranty.
RAINGEAR
We both carried OR Helium II jackets (6.5 oz), which we found satisfactory for the relatively infrequent squalls that we endured. We left our umbrellas (8 oz) behind for the Sierras, expecting less precipitation than we actually received. The umbrellas made the cut in the Winds, which of course granted us perfect weather for nearly the entire trip. For about 14 oz total, we find the combination of light rain shell and umbrella to be a great nasty weather setup.
SHOES
Some people would argue that routes such as the SHR aren’t suitable for a typical thru-hikers shoe choice. We wore our usual trail running shoes, VA in her Altra Lone Peak 2.0 and me in Brooks Cascadia 8. Neither of us rolled an ankle or broke a toe, although both of our shoes showed wear and tear much sooner than if we had been walking trail. We both wear, and love, Injinji toe socks, and subsequently had no blisters.

Let ’em breath!
FOOD
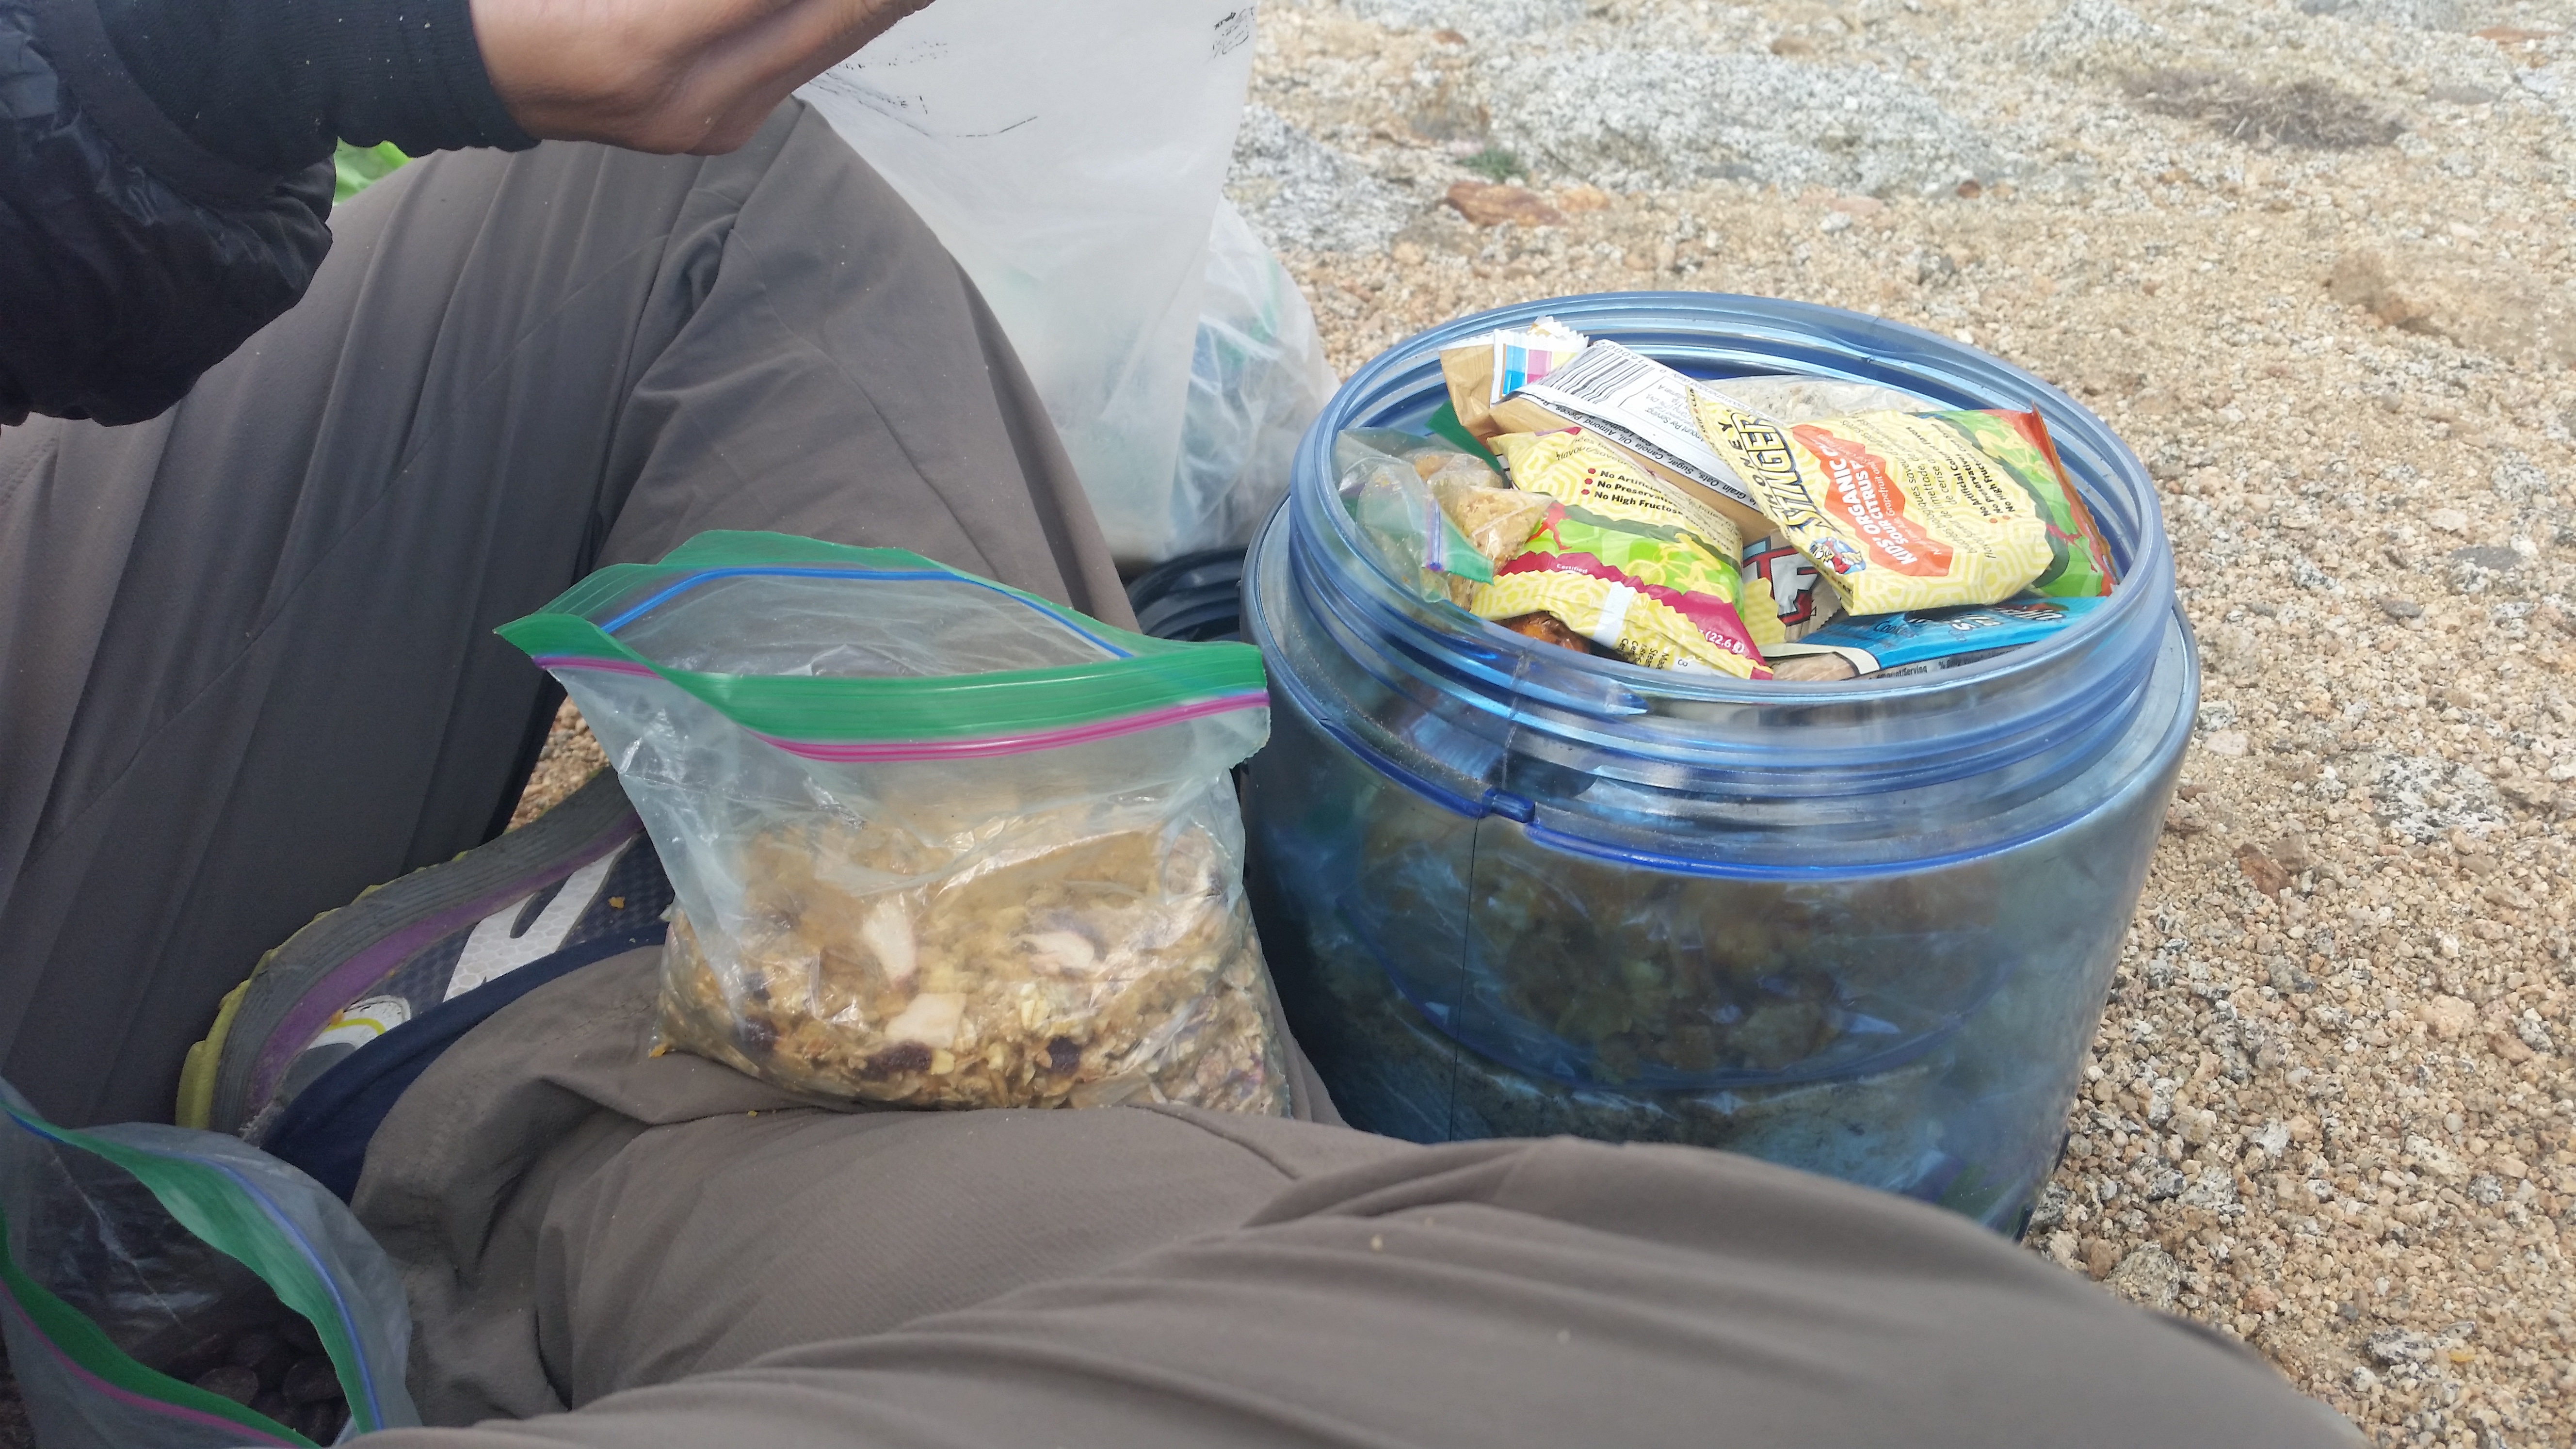
We were able to fit 5+ days of food into our BV 450 canisters by packing each day on top of the next, utilizing every nook and cranny along the way.
For three season trips, we almost always forego the bulk and weight of a stove and simply rehydrate our meals in a screw-top Ziploc container. Hot coffee, pizza and beer taste so much better when you’ve been eating cold food for a week. Our daily menu included coffee, steel cut oats with dried fruit, refried bean burritos with Fritos and spinach (stock up on Taco Bell sauce packets), hard salami, chipotle tuna packets, Larabars, and chocolate. Lots of chocolate. Check out our article on food for more tips on feeding yourself.
WATER
Some of the finest water on the planet sits high in the Sierra, free for the adventurous to slurp before it loses elevation and is diverted to satisfy the insatiable needs of SoCal. We were equipped with one vessel each (1 Liter SmartWater) and rarely needed to carry water with us, preferring to camel-up at any number of pristine streams or lakes. We each had a Sawyer filter that screws onto our water bottle, and used it with discretion, often just drinking straight from the source. We also carried a 2-liter Platypus for camp, but never used it.
Filling up on fresh snow melt. At higher locations, far from trails and people, we drink straight from the source.
MAPS/PLANNING
We kept it old school. In the Sierra we carried an old copy of the Roper guide, compass, and maps of the area that we printed from Caltopo. Steve Roper wrote his guidebook in a northerly fashion, so we had the additional challenge of reading it backwards. We enjoyed this process more than if we were following a set track on a map or GPS, and feel that it makes for a stronger experience. Speaking of GPS, we didn’t carry one, nor did we carry a personal locator beacon (PLB). Some may consider this foolish due to the remote nature of the route. For future routes of this sort, a PLB would be a wise investment. We feel that for the most part, navigation along this route is straightforward and mostly line-of-sight.
LOGISTICS
For the SHR we headed southbound, and left Occupanther in Lone Pine parked behind the Chamber of Commerce ($20/week donation). We took Eastern Sierra Transit from the McDonalds parking lot in Lone Pine north to Bridgeport ($22), where we obtained permits and hitched to Mono Village to begin our trek. Three weeks later when we extracted ourselves from Whitney Portal, an easy hitch got us down the mountain and back into Lone Pine. If you’re hiking the traditional SHR you’ll be starting and ending on different sides of the range, making shuttles a little more interesting.
We also traveled south on the WRHR, so we left Occupanther parked at the populous Big Sandy trailhead and scored a ride into Pinedale almost immediately from the parking lot. From Pinedale we got several lucky hitches to Green River Lakes Trailhead. This is a fairly remote area and we feel our luck with hitches might not be easily replicated. We started and ended on the western side of the range. For an eastern entry/exit into the Winds, Dubois and Lander seem to be the best options.
In the Sierra, we sent ourselves two re-supplies; the first to Reds Meadow outside of Mammoth Springs, and the second to Parchers Resort outside of Bishop. In the Winds we carried all the food we needed from the start.

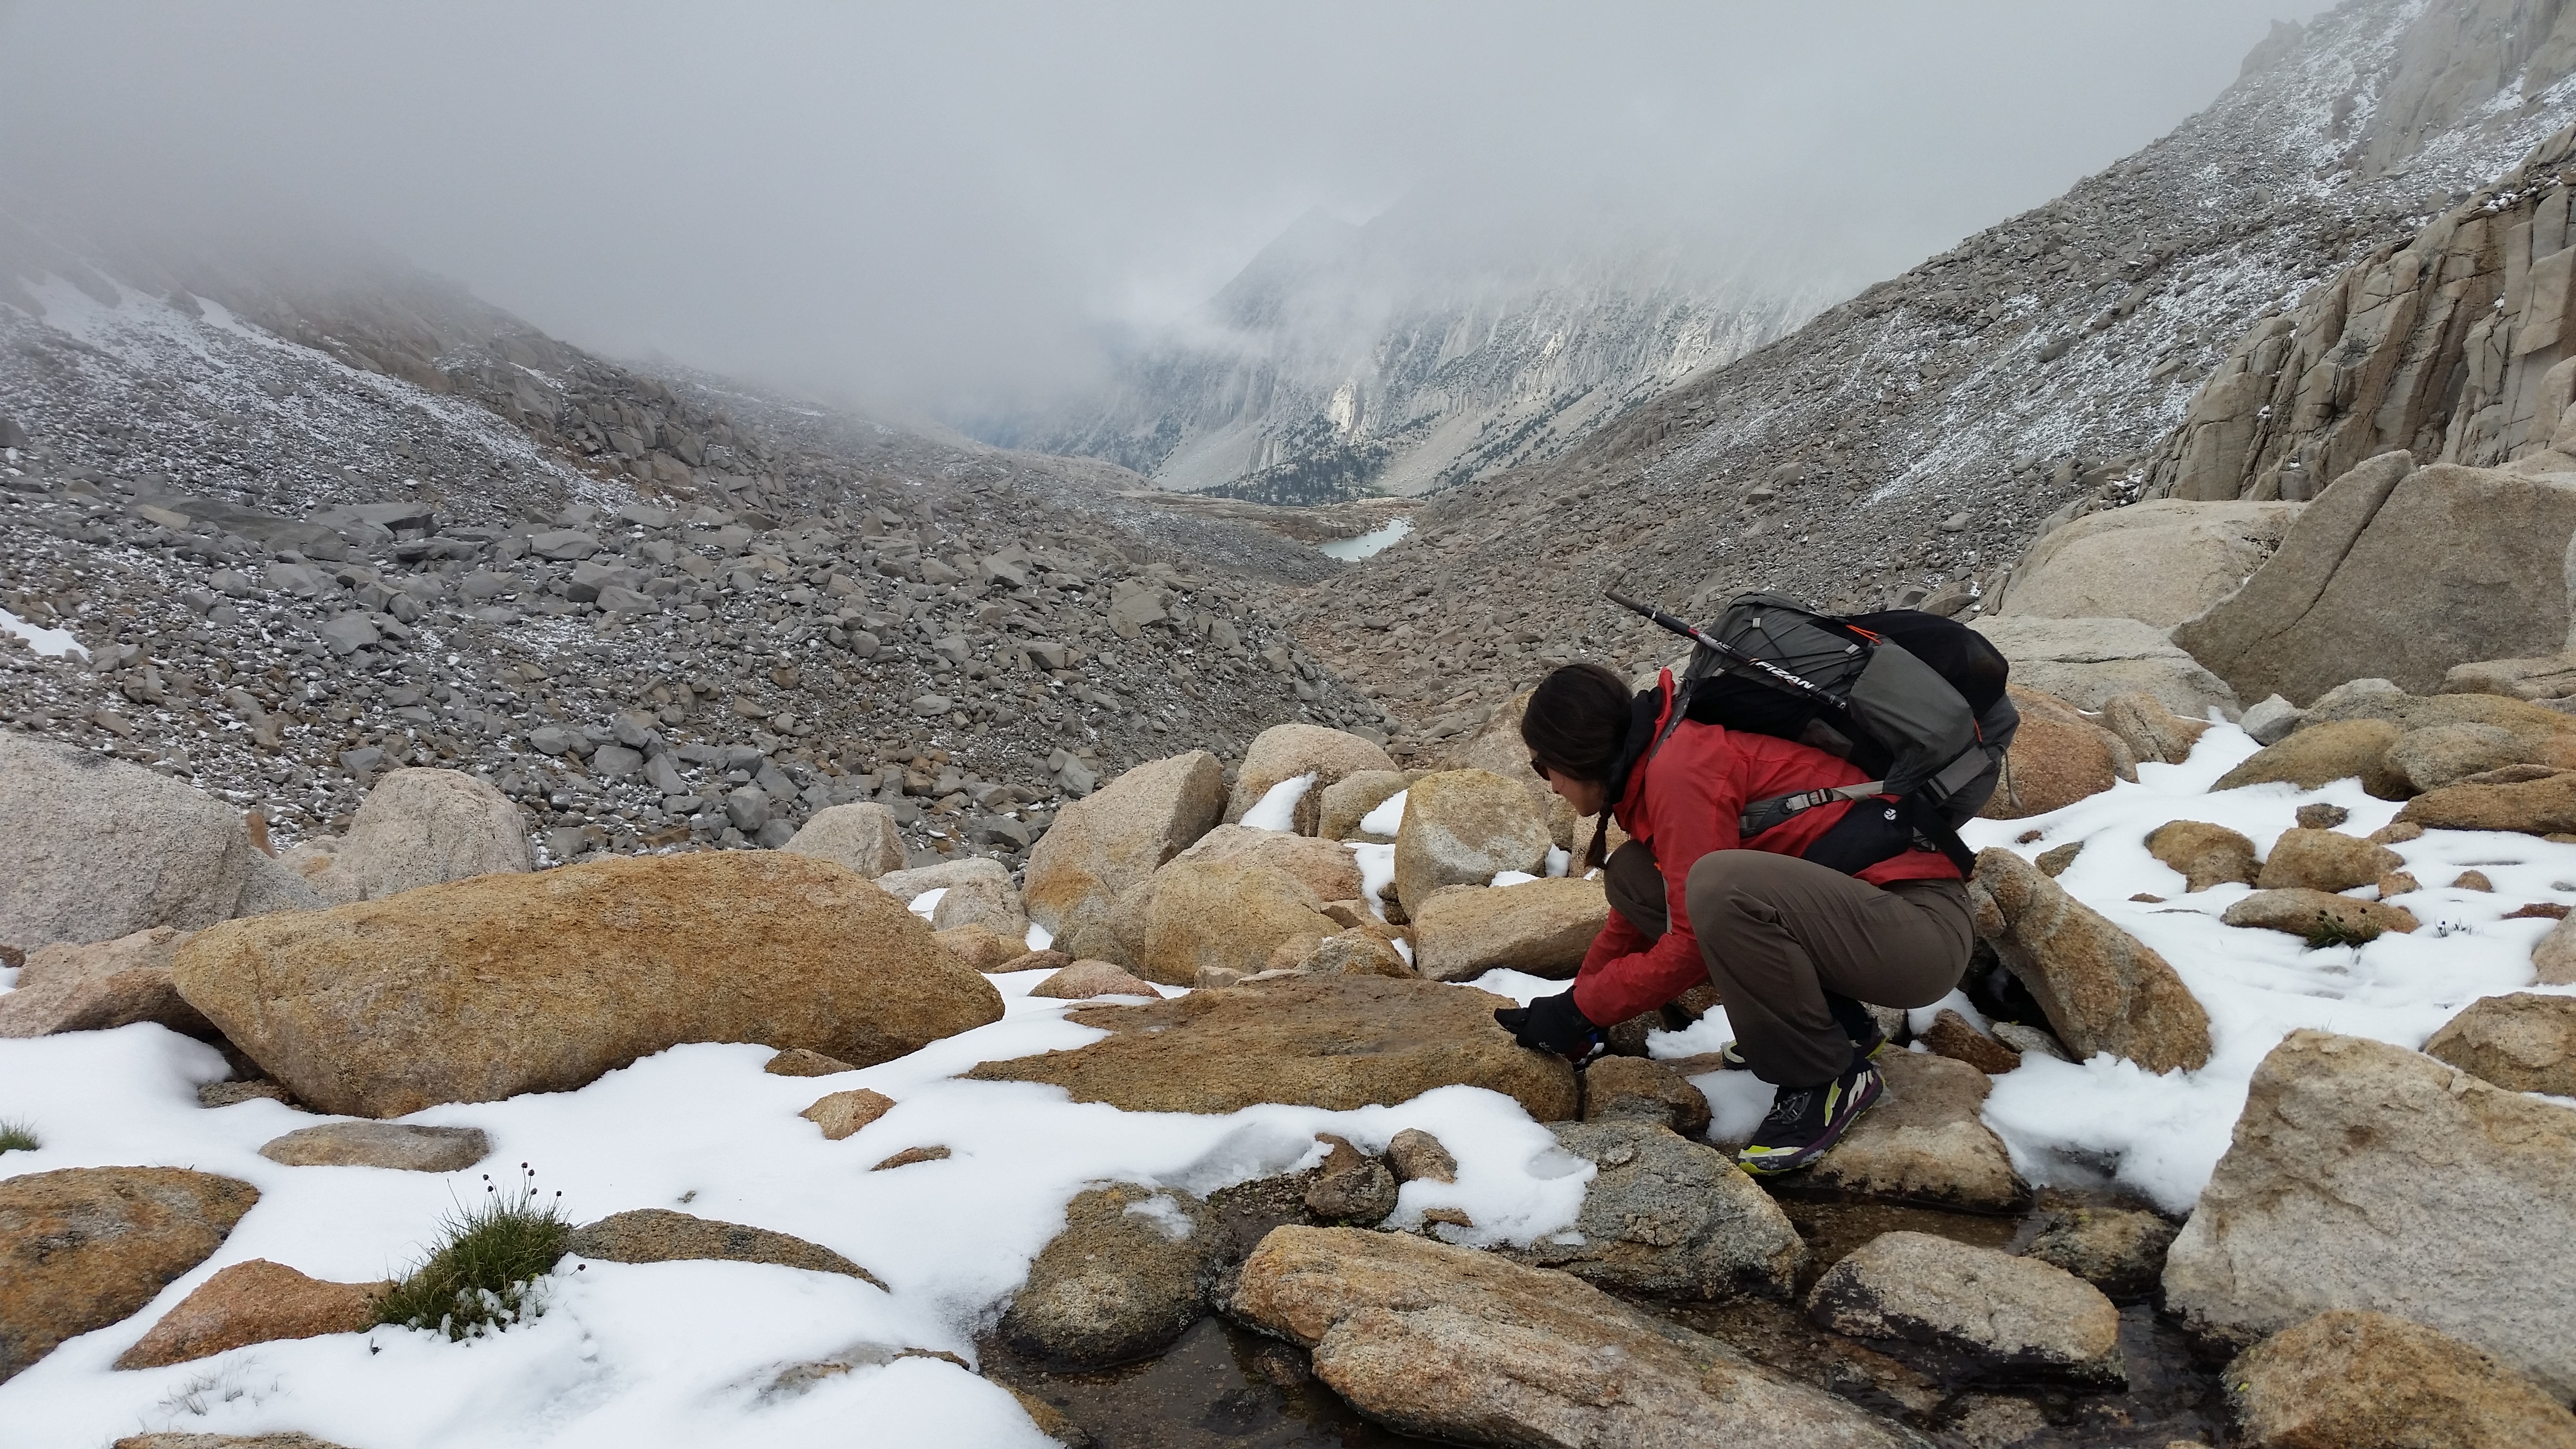
VA crosses the talus field at the base of Knifepoint Glacier in the Wind River range. We both carried microspikes through the Winds, knowing we’d only use them once, on this glacier crossing.
Things We Would Do Differently
- Carry a PLB. For the family.
- On the SHR, carry fewer days of food between Reds and Mono Village, resupplying at the surprisingly semi-affordable store in Tuolumne Meadows. Also, the lodge at Tuolumne is practically giving away bottles of local microbrew for $1.75
- Avoid the Acrodectes High Route option on the SoSHR. We spent the better part of a day attempting, and failing, to cross an impassable ridge off the north side of Acrodectes Peak. With the subsequent backtracking through a heinous slope of unsettled glacial debris, we were set a day behind and didn’t have the food reserves to complete our intended route to Cottonwood Lakes, instead extracting ourselves at Mt. Whitney.
These are methods that worked for us, and may not work for everyone. We’re happy to answer any questions you may have, so shoot us a message, or leave a comment below.


This is a wonderful post! Thank you.
Great post. Thanks for sharing.
Thanks for the informative post. Below are a few responses, mostly in agreement.
1. Shelter. My 1-man shelter for the SHR and Winds was a Gossamer Gear SpinnTwinn. In the Winds I backed this up with a homemade sleeping bag cover (silnylon bottom, Impetus top). The ST is OK, but the A-frame shape lends itself to weather blowing through the sleeping area. I’ve long considered the TrailStar as a 2-man option and I appreciate you sharing your experience with it. Finally, someone who realizes that walking without trekking poles above timberline has its advantages.
2. Packs. I wish Gossamer Gear offered the Kumo with a minimal “frame” to better carry a bear canister and a larger top pocket. Most lightweight packs are too large and flimsy for the gear I carry. The Kumo is a good size but I’ve never liked frameless packs for extended resupplies.
3. Clothing. I agree. I always backpack at altitude with a long sleeve shirt and long pants. Supplex nylon protects you from the sun and mosquitoes. The use of sunscreen and bug repellent is kept to a minimum.
4. Rain gear. A LW rain jacket and umbrella are a good choice. The umbrella is also great for full sun. Do you find a short rain kilt/skirt unnecessary? I haven’t used one yet. I suppose if the winds were high then the kilt/skirt would go on and the umbrella put away.
5. Shoes/sox. For me running shoes don’t provide good enough traction for talus hopping. The old Montrail Hardrock was great. I hope they bring it back. It was essentially a beefy running shoe but with sticky rubber on the sole. Injinji socks help prevent blisters for me, too.
6. Water. “Some of the finest water on the planet sits high in the Sierra, free for the adventurous to slurp before it loses elevation and is diverted to satisfy the insatiable needs of SoCal.” Why do you rag on the people of SoCal? If you look at the water usage of the Sierra snow pack you will know that urban usage is minuscule compared to the use by agriculture. Further, agribusiness exports a lot of California produce to Asia for the profit of the few.
Thanks again for the interesting article.
“Do you find a short rain kilt/skirt unnecessary?”
We don’t find a rain skirt necessary. For extended time in rainy and cold conditions, a light rain pant would make the cut.
“Why do you rag on the people of SoCal?”
No ragging here, more of a reference to the sheer number of people who live in Southern California, and the water needs that a population density of that magnitude necessitates. Let’s just hope this “Godzilla” El Nino manifests itself, for everyone’s sake.
Great guidance and experience!
Thanks for the detailed guide. I am planning a Roper High Route trip and was delighted to learn about the SoSHR extension.
Thanks or the details on gear/ clothing/ food selections and on logistics. This information is not in the Roper book!
Feel free to shoot us a message if you have any more questions and we’d be happy to share what we learned and what worked for us 🙂 Have a great time on the SHR!
Planning on a WRHR trip this August 2016. How challenging is the navigation in terms of staying on route and related trail identification? Am used to trekking here in the south (North GA, Smokies, AT) mostly on trail with signage. Been studying Andrew Skurka’s trail package, purchased for $25. Any tips or advice is appreciated.
Hello Michael! We, more or less, followed Alan Dixon & Don Wilson’s WRHR, so you could look up their personal sites online to read more details. Definitely feel confident using a map and compass, as route-finding skills are necessary. There are some parts on trail, but mostly the route tries to follow closely the Continental Divide at higher elevations than trails. I hope this helps! Feel free to message us with more questions 🙂
Great post, guys! Useful logistical info and beautiful photos……….particularly like the “before & after” Trailstar shots in the snow!
Thanks Cam! We’re headed back to the SHR in August to do the first section as a warmup before the CT and L2H.
Hopefully we won’t have to share the route with the likes of Allgood and company this time around 😉
Sounds like you have another great summer of hiking ahead! I think AG will be rambling along the CDT until early September. You never know………..after that you may just see his perpetually smiling mug back in Colorado hiking through the San Juans!
Pingback: Big Sur Moon | unbound routes
Pingback: A Video Retrospective of the Colorado Trail | unbound routes
Pingback: A Quick & Dirty Guide to the Lowest to Highest Route | The Hiking Life